Saturday, September 22, 2012

Ten Steps to Navigating Microsoft Ribbon


The new Microsoft Ribbon has replaced the old familiar File Menu system but old users often don't want to relearn what they thought they knew. The new Microsoft Ribbon will actually help you work more efficiently but first you need to understand how to navigate the new look.

tip01-ribbon


1. The Microsoft Ribbon

Menus and Toolbars have been replaced by the Ribbon.
The Ribbon has three basic components.
Tabs: there are six of them across the top. Each represents an activity area.
Groups: Each tab has several groups that show related items together.
Commands: A command can be anything from a button, a drop-down list, or a box to enter information.
Minimize the Ribbon by double-clicking the active tab. The groups disappear so that you have more room.
To see all the commands again, double-click the active tab again to bring back the groups.

Dialog Box Launcher
When you see a small arrow (called the Dialog Box Launcher) in the lower-right corner of a group, it means there are more detailed or advanced options available for the commands in the group.
Click the arrow to open a dialog box or a task pane where you can work with the available options.

2. Microsoft Buttontip 2 the microsoft button image

The File menu has been replaced in Office with the Microsoft Office Button.
Click this button, in the upper-left corner of the program window, to get the same basic commands as before to open, save, and print your documents.

tip 3 contextual tabs image


3. Contextual Tabs on the Microsoft Ribbon

In the new version of Office, certain tabs appear only when you need them.
If you select a picture, the Picture Tools appear. Click the Format tab and more groups and commands appear for working with pictures, like the Picture Styles group.

tip 4 alt key shorcuts image


4. Alt Key Tips on the Microsoft Ribbon

Pressing the ALT key displays Key Tips. This new feature is called Badges.
Press the key for the tab or Quick Access Toolbar command you want.
If you press a tab Key Tip, you’ll see the Key Tips for every command on that tab.
Press the arrow keys, or the tab key, to move within a tab.

tip 5 recent file list


5. Always Keep Filename on Recent Open List

In the recently opened file list you will notice a grayed-out pin to the right of a recently opened file name.
If you click-on the grayed-out pin it will turn to a green colored pin. This action will now keep this file on the Recent List no matter how many files you open after closing this file.

tip 6 magnification zoom image


6. Zoom Slider

Look in the lower-right corner. Drag the slider to the right to zoom in, and drag it to the left to zoom out.
Clicking the percent number to the left of the slider will open the Zoom dialog box, where you can specify a zoom percentage.


7. Quick Access Toolbar on the Microsoft Ribbon

The Quick Access Toolbar (QAT) is located above the Ribbon. The toolbar’s shortcuts can be customized by the user.
To add shortcut icons:
Method 1:
Right-click on the icon in the Ribbon you want to add to the QAT and select Add to Quick Access Toolbar.
Method 2:
1. Press the down arrow on the far right of the QAT and select More Commands.
2. Check the box to Show Quick Access Toolbar below the Ribbon.
3. Select a Command from the tab on the left to add to the QAT and press Add. Repeat step 3 until finished.
Then click OK.

tip 7 quick access toolbar option 1 image

tip 7 quick access toolbar option image


tip 8 new save options image

8. New File Formats

The new Office document file format is based on the new Office Open XML Formats.
Older versions of Office cannot open the new format. You can save a new file in the older format but you lose the new features in doing this conversion.
The new file format makes your documents safer by separating files that have macros, it makes your document file sizes smaller, it helps make your documents less susceptible to damage and it gives you the ability to use new Office features, such as SmartArt Graphics, math equations, themes and content controls.

A new save as PDF option lets you convert your Office files to the PDF file format without Acrobat.


tip 9 new fonts image


9. New Fonts

Office uses new default fonts that older versions of Office do not have installed.
The old versions of Office used Arial and Times New Roman as their default fonts.
Office uses Calibri in place of Arial and Cambria in place of Times New Roman. This can lead to different line breaks when sharing a document created in the newer Office with users in an older versions.

tip 10 text toolbar


10. Mini Text Toolbar

Select your text by dragging with your mouse, and then point at the selection.
The Mini toolbar will appear in a faded fashion. If you point to the Mini toolbar, it will become solid, and you can click a formatting option on it.


get cliff ping image
Think of Cliff Ping as your graphics specialist. Based in Miami, I offer services in Web Site Design, PowerPoint slide creation, Photoshop photo retouching, desktop production and computer software training in Adobe and Microsoft products.
Under promise over deliver, get Cliff when you need help.


Contact Cliff at cliff@cliffping.com     web site: cliffping.com


Remove a Color Cast


This is a beginner’s Photoshop how-to technique that will remove a color cast from an image. Any image that has too much red, green, blue, or yellow is said to have a color cast. afg-too-blue300p
You have a great picture but all of the faces are blue. Now panic sets in. How can you fix this! Take a deep breathe.
I will show you a simple two-step Photoshop how-to technique that will remove a color cast.


The Theory – Setting the Stage to Remove a Color Cast

Once the image with the color cast is opened you need to open the Levels dialog box – Image>Adjustments>Levels (Control+L).
If you are using a program other than Photoshop and can’t find a levels option, look for something called Histogram. Some software programs call Levels by its graphical name, Histogram.
The Levels dialog box has a graph of the image’s pixels. This graph is called a Histogram (Pixel Chart) and all of the image’s pixels, based on its value, are plotted in the graph.  The Histogram Pixel Chart is labeled as (A).
On the left side of the Histogram (Pixel Chart) are three eyedroppers.
The top eyedropper (B) is filled with ink and represents the shadow eyedropper.

levels-dialog-box-before550p

The middle eyedropper is partially filled with ink and represents the midtone eyedropper.
The bottom eyedropper (C) is empty of ink and represents the highlight eyedropper.

On the bottom of the Histogram (Pixel Chart) are three triangles. These triangles represent the actual image shadow-midtone-highlight points.

The triangle on the bottom left (D) is filled with ink and represents the darkest shadow.
The triangle in the middle (E) represents the image midtone point.
The triangle on the bottom right (F) is empty of ink and represents the brightest highlight.


The Remove a Color Cast Process

This technique is going use the Levels eyedroppers to redefine the darkest pixel and brightest pixel and in the process remove a color cast by peeling the color cast from the image. 

remove a color cast before image

Step 1: After opening the image,
Select, Image>Adjustments>Levels (Ctrl+L)

Step 2: Redefine the high-light point first
Select (click on it with the left mouse button) the highlight eyedropper and then click on the image where you think the brightest printable pixel (white) for that image resides.
In this example, I picked a place in the snow.

Step 3: Now select (click on it) the shadow eyedropper and then click on the image where you think the darkest printable pixel (black) for that image resides
You can try more than one place. Your last choice is what the eyedropper sets as the shadow point.
In this example, I picked a spot on a stocking cap.

remove a color cast after levels image

The image might still need some color tuning and minor blemish repair but the color cast is gone 90% of the time.

What We Did to Remove a Color Cast– Geek Version

We used the Levels Highlight eyedropper to redefine our brightest white.
The eyedropper measured the color of the pixel we selected and determined what amount of color didn’t belong in the brightest highlight. Then the Levels Highlight option subtracted that amount from all the pixels in the image. Removing some/most of the cast and making the image brighter in the process.
Next, we used the Levels Shadow eyedropper to redefine our darkest black.
The eyedropper measured the color of the pixel we selected and determined what amount of color needed to be added to the pixel to make this pixel the darkest black. Then the Levels Shadow option added that amount to all the pixels in the image. Removing more of the cast and making the image contrast better in the process.

What We Did to remove a Color Cast – Non-Geek Version

We peeled off the color cast and made the image better by redefining the brightest and darkest pixels.


get cliff ping imageThink of Cliff Ping as your graphics specialist. Based in Miami, I offer services in Web Site Design, PowerPoint slide creation, Photoshop photo retouching, desktop production and computer software training in Adobe and Microsoft products.
Under promise over deliver, get Cliff when you need help.
Contact Cliff at cliff@cliffping.com     web site:cliffping.com


Friday, August 3, 2012

5 Common Mistakes People Make in Choosing Printers


 5 Common Mistakes People Make in Choosing Printers

During the past fifteen years, I have operated on-demand printing presses and large color electrostatic printers. I have seen a wide range of print jobs from clients that had well prepared files to clients that needed a little help to make their files print ready.

In this article I will not talk about client files instead I will focus on how people often choose their print shops.

The five most common mistakes I found people make with their print shops are:

1. People pick a printer based only on price.
You really do get only what you pay for.

Good printers cost more because they give you added value. They give you file pre-flight, consistent output, they have better quality control, they check proofs against final pages, they usually have more skillful workers and more.

2. People think all printers are the same.
Print shops use different equipment, they have different people running the equipment, they use different materials and they have different levels of expertise.

Good print shops use the same suppliers, they stock the paper they prefer to use, and they train their operators.

3. People think that all a printer needs is to have the right equipment.
If a printer has good equipment but is inexperienced in running the equipment, the output quality can’t be consistent. It could even be bad.

Guess what, equipment from the same manufacturer can produce different output.
I worked at a company that had two same model Heidelberg presses. We ran into a problem matching color on a prior print job.

We discovered the two printers produced colors slightly different. The printers were calibrated, the room environment was the same, the materials were the same and the operator was the same. We discovered like people printers have their own personality.

Our solution was to note which device a job was run on and if the client ran the same job later we ran that new job on the same device. The color matched and everyone was happy. An inexperienced shop might never have figured out the problem on-time, passing on a bad print job and losing the client.

4. People always shop around for three or more bids on a job.
If a good printer bids on jobs that he never gets, he will stop bidding or bid really high.

If you have a tight deadline, being loyal to a print shop can sometimes be the difference between getting the job done and missing a deadline.

5. People don’t give the print shop enough time.
The printing process takes time. To do the job right you can’t cut corners.

If the materials are present and the press is free it still takes a fixed amount of time to print the job and a fixed amount of time to finish the job.

If you do try to rush the process, quality will suffer.


Think of Cliff Ping as your graphics specialist. Based in Miami, I offer services in Web Site Design, PowerPoint slide creation, Photoshop photo retouching, desktop production and computer software training in Adobe and Microsoft products.

Under promise over deliver, get Cliff when you need help.
Contact Cliff at cliff@cliffping.com     web site: cliffping.com


Thursday, August 2, 2012

Free Software to Keep the Computer Running Stable


Free Software to Keep Your Computer Happy

cliff ping
I do a lot of work with individuals and small businesses that can’t afford to have an IT staff.

Most of these users are not computer savvy. To them the computer is a tool that they push a button to turn-on and when it doesn’t work they call me.

Most of my clients use their computer to do e-mail, write word documents, use excel for spreadsheets, and browse the internet. Some of my clients use the computer to make marketing materials.

cliff ping client
They like all of us want a computer to be dependable, work for us without crashing, and run fast.

Having worked with micro computers for 30 years (from building computers-to writing software code- to networking pcs-to using software-to teaching how-to use software), I have learned a lot about software and hardware and how to keep the computer humming. Yes, I am a user-friendly computer geek.

To keep my clients and my computers humming, I use these four (4) free programs. Don’t be fooled by the price tag of being free these program are very good.

1. CC Cleaner - this removes the clutter.
It has two options that I use.
Option 1 - removes temporary files, erases browser history and erases unwanted Microsoft and Adobe application history. The erasing of the history makes the browser faster and the computer faster. I use this option every week.

Option 2 - cleans-up the Windows registry. I run this option about once a month. The registry is the computers directory of contents for all the software on the hard drive. Running this option keeps the registry clean.

2. Spybot Search and Destroy - antispyware.
I have been using this software for years to root out those pesky malware, adware, and other bad guys. I run this software about once a month. The virus protection software keeps the computer free of this but just in case something slips by the virus protection software I have a backup to keep the computer clean.

3. SmartDefrag to organize the hard drive.
As files are created, then deleted, then more files created gaps are created on the hard drive. When new files are saved, they fill-in those gaps. Unfortunately the files being saved are being scattered around the hard drive. The more the files are scattered the bigger hit you take on drive performance.

SmartDefrag puts the files back in order thus increasing drive performance. I run this software about once every three months.

4. I use the AVG Anti-Virus Free Edition software for Virus Protection.
I would remind folks that anti-virus software needs to have daily Web access for updates. The application might not have an update every day but it is good to let the software check-in.

Where to Get the Software:
To get a copy of any of these applications go to the computer tech site cnet.com. Their direct software site is download.com.

Think of Cliff Ping as your graphics specialist. Based in Miami, I offer services in Web Site Design, PowerPoint slide creation, Photoshop photo retouching, desktop production and computer software training in Adobe and Microsoft products.


Under promise over deliver, get Cliff when you need help.
Contact Cliff at cliff@cliffping.com     web site: cliffping.com


Monday, July 30, 2012

5 Tips for Recording Better Computer Audio


Five Tips for Recording Better Computer Audio
Some of my clients have heard my training cd's or the good sound from the webinars I have done and said their sound doesn't come close to the quality of my sound.
Most of the time their problem is the microphone they are using.
1. Get a good microphone -The built-in computer microphone sound quality is not good enough. Do not use the sound microphone option built into the computer.
You want to get a microphone that connects via the usb port.
The entry level microphone is the simple headset microphone you can get for under $50.
For better sound you might try one of these next four choices:

A. The Blue Microphones USB Snowball is also a good choice. This microphone lists for $99  (Amazon sells it for less than $70).
B. The Samson USB Go Mic lists for $90, Amazon has it for less than $50.
C. The Blue Microphones USB Yeti Professional is a little better and it lists for $149.99 (Amazon under $100).
D. On the high-end you might look in to a Sure microphone, the Shure PG42 USB is a good choice. It lists for $250.
 
2. Invest in a Pop Filter (Windscreen) - The pop filter will deaden some of the letters you speak, like the popping sound in P.

3. Maintain a consistent sound level - When recording always set your sound settings to the same input level and quality.
When speaking try to maintain a good voice level. Speak in conversational mode. Speak in to the microphone like you are talking to someone in the same room.
If you have a cold or sore throat don't record. Wait till your voice is back to normal. Being consistent is the key.

4. Quite in the room - Turn everything off: the phone, the radio, the tv, the fax machine and e-mail.
Make a sign that says recording in progress. Then place the sign on the door during the recording to let others know.
To deaden external noise, some speakers create foam rubber sound booths around their microphones.

5. Don't be afraid to record again.
If you don't like what you said or the pace you said it in, record the passage again. Yes, I know you can edit the audio but don't be afraid to get the words right without the need of editing. Leave the editing as the last resort not the all the time fix.

Bonus Tip - Edit the Audio:
Finally, you might want to invest in some audio editing software. I use Camtasia Studio to record my computer training sessions (PowerPoint, Photoshop, Excel, Word, InDesign and Outlook). After I finish recording the training session, I can edit the audio and enhance the video with Camtasia Studio at techsmith.com.

Think of Cliff Ping as your graphics specialist. Based in Miami, I offer services in Web Site Design, PowerPoint slide creation, Photoshop photo retouching, desktop production and computer software training in Adobe and Microsoft products.
Under promise over deliver, get Cliff when you need help.
Contact Cliff at cliff@cliffping.com     web site: cliffping.com

Edit Pictures for PowerPoint


What should I get to edit pictures?

Adobe Photoshop is the best image editor on the market. Photoshop does more than edit pictures it can be used to create new art from scratch too.
Photoshop is used by graphic artists, photographers, newspapers, advertising agencies and serious image editors. The program is expensive (around $700) and it is difficult to understand.
If the need to edit pictures is an occasional need like for a sales rep, teacher, PowerPoint slide creator, scrapbooking or home hobbyist try Adobe Photoshop Elements. The current version of Elements is 10.
Adobe Photoshop Elements is great to use to edit pictures because it has many of the same features as the full version of Photoshop.

Adobe Photoshop Elements is easier to understand, it requires less knowledge, has more power features than the typical user will use and sells for $99.00.
You can obtain a 30-day trial version of Photoshop or Photoshop Elements from www.adobe.com.

If you want a program that is free, try Google Picasa. This program has the basic editing features. To get a free copy of Picasa go to Google.com.

Think of Cliff Ping as your graphics specialist. Based in Miami, I offer services in Web Site Design, PowerPoint slide creation, Photoshop photo retouching, desktop production and computer software training in Adobe and Microsoft products.
Under promise over deliver, get Cliff when you need help.
Contact Cliff at cliff@cliffping.com     web site: cliffping.com


Saturday, July 28, 2012

Better Photo Printing


ink jet printer for cliff ping article on better photo printing
4 Steps to Better Ink Jet Photo Printing


1. Choose the right paper.
Glossy paper costs more but produces realistic color photos.

Glossy paper yields the best printed image but costs more than plain paper. The glossy coating on the paper allows the ink to stay on the surface of the paper and look like a real photograph.

2. Use the ink from the printer’s company.
The printer manufacturer optimizes their ink to produce the best quality possible on their own paper. This means if you own an Epson printer use Epson ink. If you own a HP printer you should use HP ink.

3. Choose the right print size.
To obtain a good quality print, the image has to have enough pixel information. Digital cameras have a fixed pixel resolution like 2 mega pixels, 3 mega pixels and so on.

Every digital camera image has a specific file size based on the mega pixels of the camera.

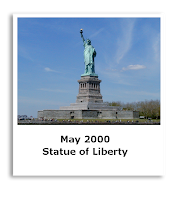
cliff ping picture of statue of libertyThe file size determines how large an area the printed image can be printed with good results. If you try to print the image in an area larger than the file size supports the resulting print looks bad.

Use the table below for selecting the largest print size for your image:
640x480 pixels: web pages only
1 Mega pixel: 4x6 realistic photo print
2 Mega pixel: good 6x9 pictures
3 Mega pixels: excellent up to 8x10
5+ Mega pixels: prints beyond 11x17


4. Match the print settings to the paper type.
Make sure the computer's print settings match the desired paper type and ink quality settings.

If you use glossy paper make sure the print settings for paper type is set to glossy paper.

If you use non-glossy paper do not use the glossy paper setting because the printer will use more ink than the plain paper can support.

Since non-glossy paper doesn’t have the glossy coating on the top layer of the paper the printed ink is absorbed by the paper and the image will look bad.

If you change the print setting to plain paper when using plain paper, the printer will use less ink and optimize the image for the plain paper.


get cliff ping image

Think of Cliff Ping as your graphics specialist. Based in Miami, I offer services in Web Site Design, PowerPoint slide creation, Photoshop photo retouching, desktop production and computer software training in Adobe and Microsoft products.

Under promise over deliver, get Cliff when you need help.

e-mail: cliff@cliffping.com    web site: cliffping.com


Tuesday, June 19, 2012


Five Tips for a Killer Presentation

1. Use fewer words on a slide – think Twitter, 
less text is better.
The second biggest complaint a PowerPoint audience gives is that the slide had too many words. The biggest complaint from a PowerPoint audience is that the presenter read each word on the slide to the audience.


2. Use multimedia and images for impact – a picture 
says a thousand words.
The image on the screen should enhance the words the speaker is saying. Make the image large and relevant. 

Know your audience and use appropriate images. For most presentations clip art should not be used. If you have a short video that ties into the slide topic use it. Try to keep the video length less than a minute. 

Be careful with object and type animation because too much animation can detract from the content.


3. Practice your presentation.  
Practice your presentation out loud.  Practice your presentation out loud while standing and keeping track of your time. The point here to remember is to practice the presentation. 

Most speakers do not practice their presentation out loud ( a lot of speakers never practice their talk) and the first time they say their words out loud is in front of the live audience.


4. Use good and consistent design for the 
slides – white space is your friend.
Be consistent in design and use white space. Do not crowd the screen with too much content and leave space around the images.

The point size of the type needs to be large. The hierarchy for type size should be main heads really big (no smaller than 36 point), sub heads – when used – smaller (try 6 points smaller than your headline size), and body text no smaller than 26 points. Body text larger than 26 points is better because your audience can read the type and you can’t insert too much text on a slide at a large point size.

You should limit the number of fonts you use in the presentation to two. Use one font for headlines and the other font for text. For contrast pick a font from the sans serif family (Verdana, Tahoma, Arial, News Gothic, Impact, Calibri) and one font from the serif family (Times New Roman, Georgia, Minion, Utopia, Charter). Bold and Italic are not fonts, they are styles of a font and do not count as one of your two font choices.

Use color to set your mood. Find colors that match your tone, your company, and your audience.
Color has subconscious feelings; use that in your design. 

Use only two or three colors in your design. Warm colors are yellow (sun), orange (energetic) and red (noticed, hot, danger). Cool colors are blue (trusting, loyal, friendly), green (nature, money) and purple (wealthy, spiritual, passionate). 

Shades are helpful but make sure they are seen well on the screen.

White backgrounds can wear out the eyes of the viewer. Black type is the most readable color for audiences.

The background should be a supporting player that aids the images and words. Think of an art museum wall. Is the wall behind the picture distracting the viewer’s eye from the art? Hope you said no. Make your slide background color light so the words can be in black and the images can shine.


­5. Deliver the presentation like you know what you are doing. Your presentation should have an opening, a middle, and a closing.
Open the presentation by telling the audience your points. Next, show the audience the proof – this is your content. Finally, close early, remind the audience what you said and add a call to action.


Bonus tip: Take a class to learn the PowerPoint program – you will be surprised by how much you were doing the hard way.

Friday, April 13, 2012

Soft Returns Read Better


Soft Returns Read Better

Control the length of your text lines by manually inserting soft returns (shift + enter). 

Soft returns force all the text to the right of the cursor down to the next line.  Any text already on the next line is moved to the right of the newly moved text. All the line spacing and formatting for the bullet point is the same. 

If you just pressed enter, instead of shift + enter, then all of the text to the right of the cursor will still go to the next line but the formatting will be for a new line.

Soft Return Example
This is how text looks with
a soft return.


Hard Return ExampleThis is how text looks after

 a hard return.


The hard return is used to start a new thought/paragraph.

The soft return is used to force a line break. The text
reads as a continuation of the same thought. 

Thursday, March 29, 2012

Lighten the Entire Image for Text


Lighten the Entire Image for Text

1.  Select the image.

2.  Right-click on the image to bring up the help menu.

3.  Select Format Picture

4.  The Picture Tab is now active. The Picture Tab has a section labeled Image control. The default choice for Color under Image control is Automatic.

Press the down arrow for Color and change the selection from Automatic to Washout.

Click Preview to see how the image will look.

In most cases,  the image is light but it still needs minor adjusting to make it look 
more realistic.

5.  Reduce the Brightness a couple of percent. 

Click Preview to see the result. 

Repeat this step until you are happy with 
the way the image brightness looks.

6.  Increase the Contrast a couple of percent. 

Click Preview to see the result. Repeat this 
step until you are happy with the way the image
 contrast looks.

7.  Click OK to apply the Washout look to the image.